

Markar HG315 Stainless Steel Hinge, Concealed Leaf with Hinge Guard


If QuickShip logo is displayed near price, this product is in stock, ready to ship! Factory lead times will apply to options that do not display the QS Logo.
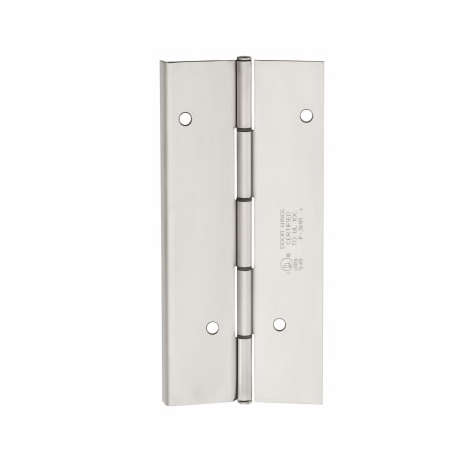
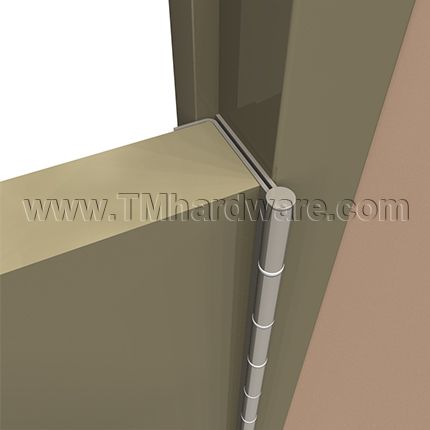
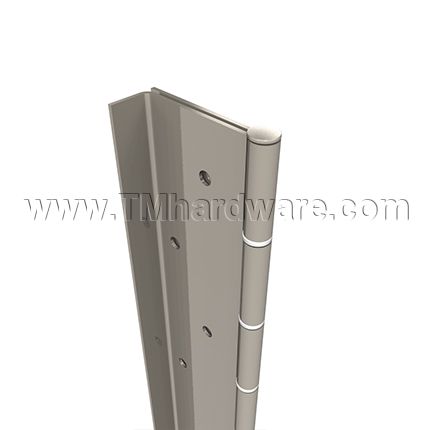
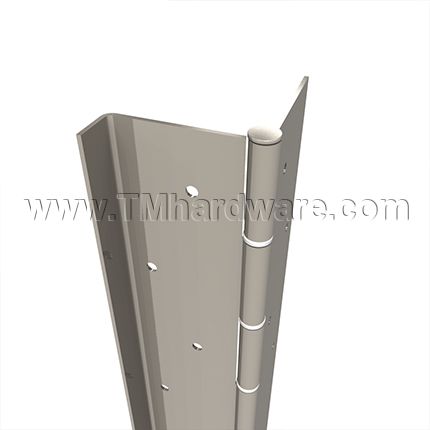
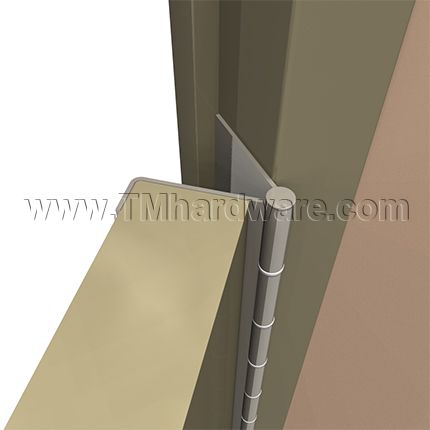
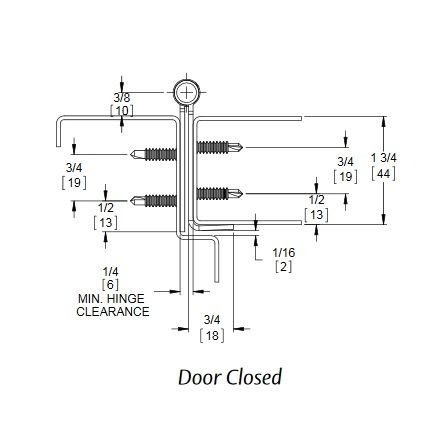
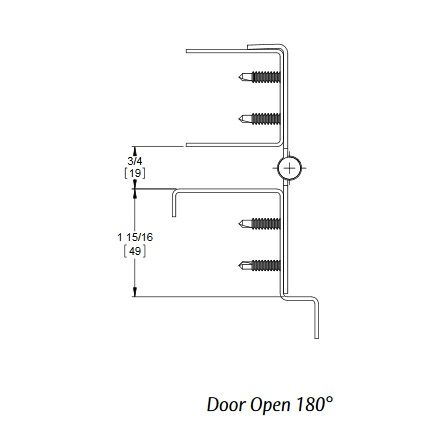
Markar HG315 is a Heavy-Duty Concealed Leaf Continuous Hinge which is mortised to the frame rabbet and edge of the door to conceal both leaves. This hinge is designed with a unique edge guard for added protection, for door weighing up to 600 lbs. and a maximum width of 4'0". Hinge is Satin Stainless Steel and available in standard stock sizes, see below for details.
PRICED PER PIECE
See tabs below for additional information
Marker HG315 is a Pin and Barrel Type Continuous Stainless Steel Concealed Leaf Hinge with Hinge Guard.
- Standard Sizes: 6'8", 7'0", 7'2", 8'0", 10'0". Custom sizing available, contact us or call at 845-388-1300 for details and pricing.
- Applications: Supports weights up to 600 lbs. 4'0" maximum door width. Extra heavy duty for high traffic, high abuse door applications, including correctional facilities, high security locations and extra heavy doors. Features a unique edge guard to prevent objects from being placed between the door as frame. Protects the door's edge while supporting the door's weight along the entire length of the jamb.
- Design: Constructed from 14 gauge 304 stainless steel (US32D), .187" diameter 304 stainless pin (rod) with medical bearings and stainless steel end caps. Each knuckle 2", including split nylon bearing at each separation for a quiet, smooth, self-lubricating operation. Fasteners concealed when door is closed.
- Finish: US32D Satin Stainless Steel (630). Custom finishes are available, contact us or call at 845-388-1300 for details and pricing.
- Mounting Hardware: Custom 12-24 x 11/16" S.S. Phillips Flat Head Undercut TEK Screws.
- Handing: Specify Handing when ordering hinge. Select handing from options above. Not sure what handing is required for your door? See How to Determine Handing / Swing of Door.
- Certifications: Fire-Rating: 3 hours on hollow metal doors. 90 minutes- hollow metal and composite. 20 minutes- wood door.
Classified in accordance with UL10C for positive pressure.
Evaluated in accordance with TAS 201-94, TAS 202-94, TAS 203-94, ASTM E330, ASTM E1886, ASTM E1996 and ANSI A250.13.
ANSI/BHMA Standard A156.26 Grade 1.
Note: Fire label for doors and frames should be placed on the header and top rail of fire rated doors and frames.
- Modifications and Options: Adjustable monitoring switch, hospital tip hinges, medical bearings, dutch door hinge preparation, custom hole patterns, special sheared leaf, wide throw hinges, raised barrel(Swage), edge guard hardware cut-outs, special length hinges, Electrical Modification Access Prep, CTP-Current Transfer Preparation, CE - Current Transfer-Concealed, CT- Current Transfer- Contact Switch, ES-Exposed Monitoring Switch, blank hinges (minus hole pattern), lead lined cover (1/16" LEAD), security fasteners are available through our office. For details and pricing please contact us or call 845-388-1300.
- Priced per Piece
- Please note, images are for illustrative purposes only. They are not actual photos. Therefore, actual colors may vary slightly and size may be enlarged to show detail. See product specs for exact measurements.
Click to view our Markar FS321 Full Surface Continuous Hinge with 3/4" offset.
This product has a 25 year warranty against defects in workmanship and material.
Click here to view our Full Warranty Policy.
Printable Documents: |
|
Click to print Markar HG315 Continuous Hinge Product Specs. |
Product Specs: |
  |
Certifications: |
 |
| Click here to print Installation Instructions for Markar HG315 Pin and Barrel Hinge. |
| All holes in the door and frame must be drilled correctly and fasteners properly installed. Failure to use the fasteners supplied by our manufacturers will void the UL or WHI fire rated listing. |
Step 1: Frame Preparation |
|
1. Place the hinge frame leaf on the frame. Position the top of the hinge 1/8" maximum below the header as shown in attachment. Place the hinge firmly against the face of the frame. 2. Mark and center punch each hole on the frame with the hinge held firmly in place. For ease of installation, a center punch can help center the hole so that the fasteners will enter straight. Remove the hinge form the frame and prepare to drill the frame. 3. Drill holes. For wood frames, drill all holes using a #28 or 9/64" drill bit. For hollow metal frames, drill all holes using a #28 or 9/64" drill bit. If hollow metal frame is reinforced, thread all holes with 12-24 tap. Do not install the hinge to the frame at this time. |
Step 2: Door Preparation |
|
1. Place the hinge door leaf on the edge of the door. Position the top of the hinge flush with the top of the door. 2. Mark and center punch each hole on the door with the hinge held firmly in place. Remove the hinge form the door and prepare to drill the door. 3. Drill holes. For wood doors, drill all holes using a #28 or 9/64" drill bit. For hollow metal doors, drill all holes using a #28 or 9/64" drill bit. If hollow metal door is reinforced, thread all holes with 12-24 tap. |
Step 3: Hinge Installation |
|
1. Attach hinge to door. For wood doors, attach hinge using #12-8 x 1 1/2" Flat Head Particle Board Screws (PBS12150SP10SS). For hollow metal doors, attach hinge using #12-24 x 11/16" Flat Head Undercut Self Drilling Machine Screws (TKS1267SP10SS). 2. Attaching the hinge to the frame. For wood frames, attach hinge using #12-8 x 1 1/2" Flat Head Particle Board Screws (PBS12150SP10SS). For hollow metal doors, attach hinge using #12-24 x 11/16" Flat Head Undercut Self Drilling Machine Screws (TKS1267SP10SS). PRODUCT MUST BE INSTALLED ACCORDING TO ALL APPLICABLE BUILDING AND LIFE SAFETY CODES. |